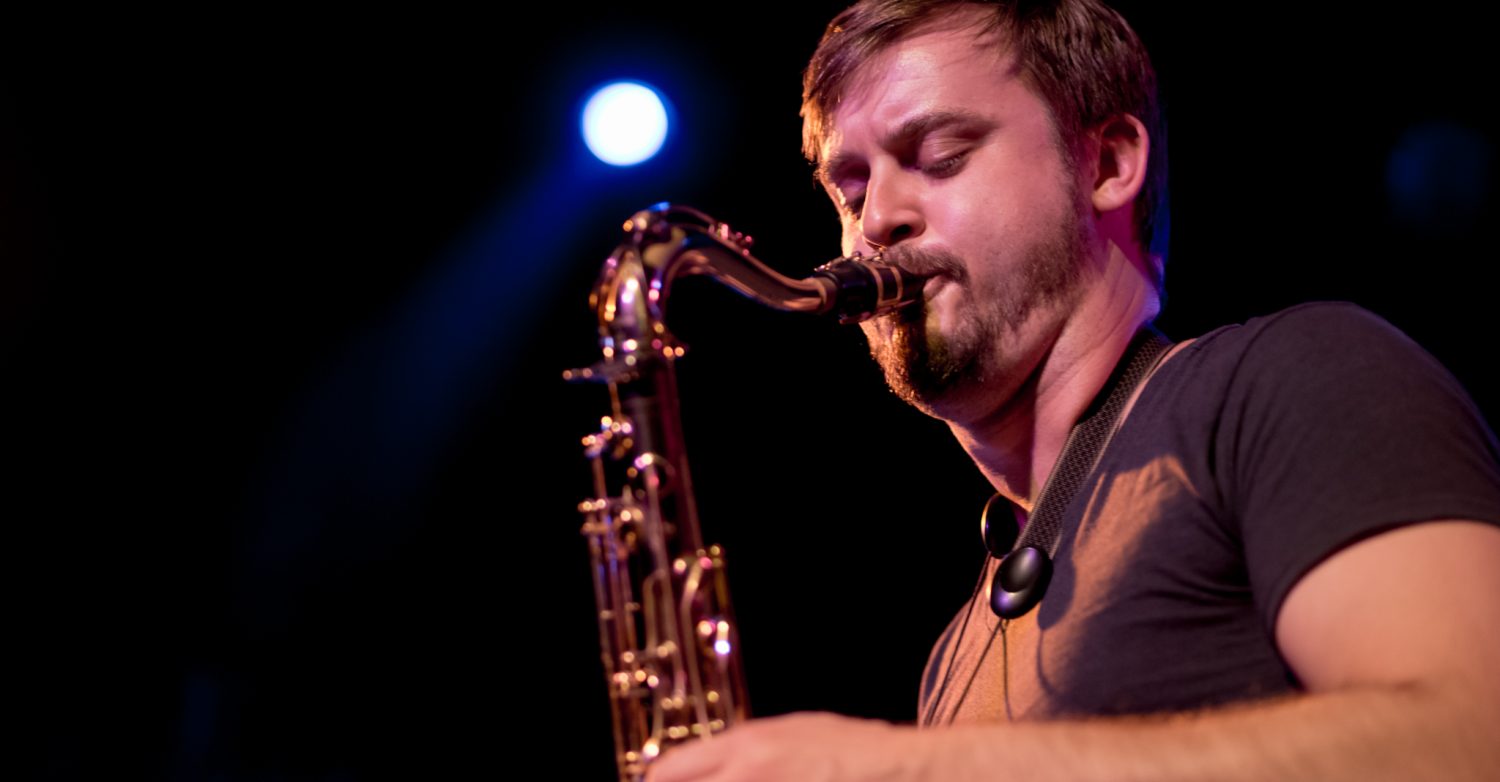

I recently wrote an article for the good people at EarthQuaker Devices about the realities of being a musician during the COVID crisis. I focused in particular on the fact that the necessary isolation that prevents us from playing music with and for other people in real-time has forced us to become bedroom producers. The only way we can collaborate with other musicians is by recording ourselves, and as a result, many gifted musicians who might be masters of their instruments find themselves struggling with the logistics and nuances of recording and mixing audio.
Many of us were already heading down this path. High-quality studio sessions can now happen between musicians and producers all over the world without anyone having to spend thousands of dollars on plane tickets and studio time. Remote recording sessions are becoming increasingly standard: In the last two years I’ve recorded saxophone, woodwind, and keyboard parts for artists and producers in Belgium, the Netherlands, Los Angeles, London, and New York, all from my home studio in Austin. I’ve been independently interested in self-contained composing and producing for over a decade, so I had a bit of an advantage when the pandemic crisis hit. I thought it might be worth spelling out the most important foundational tools and technology required to make good-quality studio recordings at home.
I’m going to mention quite a few brands and manufacturers of audio gear below, but I’m not associated with any of them, nor have I received money or free gear from any of them. And hey, I’m not opposed to free gear! But this is an honest run-down based on my own first-hand experiences and occasionally second-hand experiences of trusted friends and colleagues.
I. Source and Room
The most important element of a good recording is the source being recorded. A musician’s many years of honing instrumental or vocal skill are just as crucial now as they were when live performance was possible. A great musician on a hundred-dollar microphone will sound much better than a poor musician on a ten-thousand-dollar microphone. This is good news for experienced musicians, since the most crucial part of the process is already done!
Room treatment will be a bigger challenge for experienced musicians. The sound of a room will potentially significantly affect the sound of a recording. There are many online resources and helpful videos about room treatment, and it’s a rabbit-hole worth exploring, but here are some basics.
If you’re recording an acoustic instrument or voice, you’ll want to avoid recording in a small space. Leave as much space as you can, preferably several feet, between your microphone and walls. If your space has a sloping ceiling or non-parallel walls, even better. Anything that helps reflected sound waves scatter into smooth, diffuse, pleasing-sounding reverb will help the recording.
If you can, invest in some quality acoustic panels for sound absorption. High-frequency and midrange reflections can create very unpleasant-sounding midrange honk and unintentional slap-back, but absorption will help to tame those. Low frequencies can be managed by bulky absorbers called bass traps that are often placed in the corners of a room, where low frequencies build up. In my experience, bass traps tend to be more crucial for mixing than for recording – any experienced audio engineers who disagree with me can feel free to send me an angry email of disagreement – so for most musicians who are recording acoustic instruments or voice, using absorption panels to manage the high and midrange frequencies might be a better first step.
In addition to acoustic panels, furniture and clutter can actually do quite a lot to improve the sound of a room. Tall bookshelves, dressers, and couches provide a fair amount of absorption. Don’t be afraid to clutter your studio, it might actually improve your recordings! This won’t be as true if you’re building a room for high-end mixing or mastering, but for recording sessions, multi-purpose furniture can help quite a bit.
II. Recording device: Computer and DAW
Like almost every modern industry, music production today involves significant use of computers. Stand-alone devices that work well for high-quality recording do exist, such as the industry-standard Sound Devices field recorders, or more recent competitors like Zoom. But the easiest and best way to get professional audio results at home is to use your computer and a piece of software called a digital audio workstation, commonly abbreviated as DAW. This takes the place of a traditional studio’s mixing console, tape reel, effects racks, and so-forth, providing a handy graphic user interface for capturing and editing audio signal.
There are numerous DAW options today. The two at the top of the game are Avid’s ProTools and Apple’s Logic. ProTools is the industry standard for recording and mixing audio, and it’s found in most commercial recording studios. ProTools’ top competitor happens to be my DAW of choice, Logic, which is owned by Apple and therefore unfortunately only works on Mac systems. There are plenty of good alternatives to Logic and ProTools for Mac and Windows: if you already own a Mac, it will come with Garage Band, which is a scaled-back version of Logic and perfectly good for basic audio recording and editing. If you’re on Windows, Reaper is an affordable and full-featured DAW with a great reputation. Other popular cross-platform options are Ableton (my favorite after Logic), Cubase, and Presonus StudioOne, along with many more.
Whichever DAW you go with, make sure to take some time to get comfortable with it, and keep in mind you don’t have to know everything about it to start recording. It’s actually best to learn as you go, and numerous online tutorials, forums, videos, and FAQ pages are out there to help.
III. Audio Interface
In order to convert the sound of your recorded instrument or voice into digital information your computer will understand, you need an audio interface, which is a device that incorporates preamps and digital-audio/audio-digital conversion. There are hundreds of audio interfaces on the market, and they can range from very cheap to very, very expensive. Most musicians will do fine with a basic but serviceable audio interface with one or two preamps and one or two direct inputs that will connect to your computer via USB.
It’s worth knowing a bit about the elements that make an interface work. It’s tempting to buy the cheapest interface possible, but a musician who does so risks being frustrated by poor audio quality from a shoddy preamp or relentless software glitches caused by cheap converters and drivers. A “preamp” is an amplifier necessary for a microphone signal to reach a useable level. Preamps alone can cost thousands of dollars, but modern affordable interfaces come with clean, serviceable, uncolored preamps that provide enough gain for most microphones, even lower-sensitivity dynamic mics.
Analog-to-digital and digital-to-analog conversion combines microprocessors with driver software to turn analog audio signals from the preamp or direct input into digital language that the computer and DAW can understand. They also convert the digital information back into analog audio signal for playback through monitor speakers or headphones. Converters and software drivers can help a recording session to be seamless if they’re good or agonizing if they’re bad.
There are overwhelming options for entry-level interfaces on the market. I’m personally a fan of Steinberg’s line: the build quality is good, the components are good, the user interface is easy and straightforward, and the price is reasonable. (Steinberg is now owned by Yamaha, and I have a lot of respect for Yamaha’s quality control.) Friends of mine get great results out of similar competitors by Audient, MOTU, and Focusrite. Many successful musicians and producers are big fans of the more expensive Universal Audio “Apollo” interfaces, which incorporate some fun proprietary plugins that emulate vintage gear very well, but these are probably overkill for a musician just getting started with recording.
IV. Microphone
If you only plan on recording electric guitar, electric bass, or electronic/electromechanical keyboards directly into your DAW without an external amplifier, then you can skip microphones and preamps altogether by plugging directly into the DI on your interface. Done, easy! However, if you plan on recording any kind of acoustic instrument, including voice, or recording the tone of your amplifier, which can be a huge part of a guitarist’s or bassist’s sound, you’ll need to have a microphone and learn how to use it, and there’s quite a bit of science involved.
There are two basic types of microphones: dynamic/moving-coil mics (including ribbon microphones) and condenser or capacitor mics. There are excellent and terrible mics of both varieties, and there are characteristics of each type that are important to understand.
Musicians who perform live are probably already very familiar with dynamic microphones, and in particular the ubiquitous Shure SM57 and SM58. These are perfectly serviceable mics for recording, too. Not everyone loves them and they don’t always sound amazing, but very professional, good-sounding, and famous recordings have been made on both. Dynamic microphones like these are “passive,” meaning they don’t require external electrical current to create an audio signal, but as a result they typically require a lot more gain (preamp power) to get a useable signal for recording. If you have a very loud voice or play a loud instrument like trumpet, trombone, or drum set, dynamic mics can work very well. Strong vocalists like Michael Jackson and Stevie Wonder have gotten great results out of dynamic mics like the Shure SM7 (Michael) or Electro-Voice RE20 (Stevie), although both also used condensers as well. One of my saxophone heroes, Michael Brecker, famously preferred the RE20 for his live performances, although he usually used Neumann condensers to record.
Dynamic microphones tend to be great at rejecting unwanted room sound, which can make them excellent for home recording as long as you have enough volume and gain to work with. They also tend to be much more affordable than condensers of comparable quality, so you can get a top-tier dynamic for the price of a mid-tier condenser. I often recommend the affordable and durable Shure SM57 as a good first microphone for home recording, but if you can budget some extra money for your first microphone (which I would highly recommend), some good contenders are the Electro-Voice RE20, Beyerdynamic M88, and Sennheiser MD421, all of which sound great on instruments and voices. Each of those mics is well-regarded as top-quality gear. The most highly-regarded dynamic microphone ever made, the Sennheiser MD441, is a wonderful instrument and vocal microphone, comparable to very expensive condensers. It’s under a thousand bucks brand new, so it’s relatively affordable for a top-quality mic.
Condenser microphones are a whole universe unto themselves. They can range from very inexpensive and poor-quality to extremely expensive, the price of a car or a down-payment on a house, with legendary status among audio engineers and producers. They can be very, very small or very, very large. They can sound absolutely terrible or larger-than-life and wondrous. Dynamic mics are probably easier to get to sound good, but if you have a good-quality condenser and learn how to use it properly, you can make some world-class recordings.
The two big names associated with condenser microphones are Neumann and AKG. Certain vintage microphones by these two makers can go for twenty thousand dollars or more. Today, Neumann is owned by Sennheiser, but their manufacturing and operations in Berlin are still autonomous and generally considered top-quality. AKG has changed hands several times in the last few decades, and their reputation has declined recently as they were acquired by Samsung and their historic Vienna operations were shut down and moved to Southeast Asia. There are numerous inexpensive condenser microphones being produced in Asia that are based on Neumann and AKG designs but with inconsistent – and sometimes disastrous – quality control. I recommend staying away from MXL and Behringer mics, for example.
As it happens, though, two of my favorite condenser microphone makers are Asian. Audio-Technica, a Japanese company, makes excellent and relatively affordable condenser mics, and I often recommend the AT4033, AT4040, and AT4050 models to musicians who want to upgrade their home recording capabilities. My trusty AT4033 has been on dozens of recording sessions over the years and I still love it today.
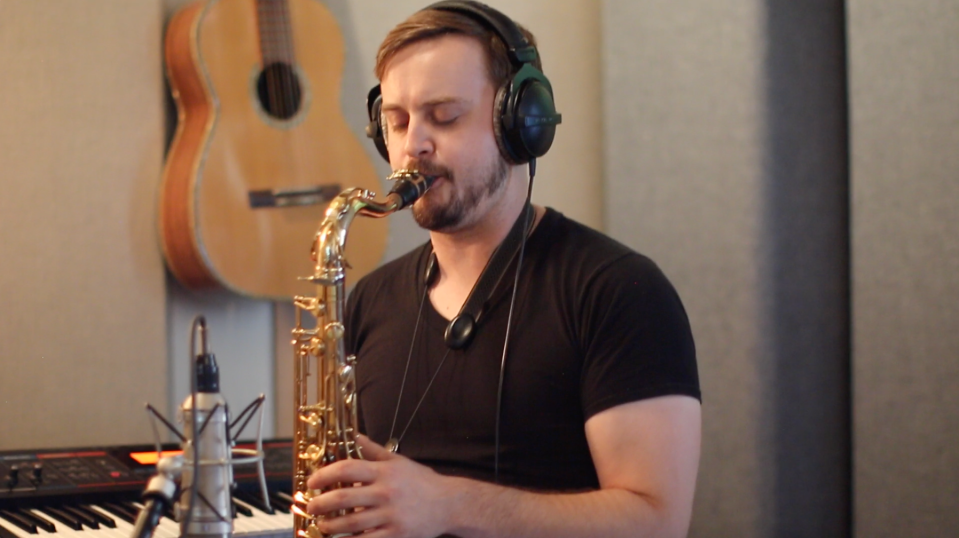
More recently, I discovered a small company run by a brilliant Chinese-Australian engineer called 3U Audio which is producing excellent-quality condenser mics modeled after good Neumanns for reasonable prices. The components, consistency, build quality, and sound of these microphones are phenomenal for the price tag. Nearly all of my recordings for the past six months have been with a 3U Audio “Warbler MKID” mic, which is modeled after the Nuemann u87 (one of my favorite microphones), and I’ve been tickled with the results.
Regardless which condenser mic you get, it’s important to know that it will be “active,” which means it will require a small amount of electrical current in order to work. Most condenser mics work with “phantom power,” which you can engage on your interface by flipping a switch or pressing a button that will say “+48v” or something like that.
Ribbon microphones are very cool variations of the dynamic mic concept and can sound beautiful on the right voice or instrument. They tend to be more specialized and less general-purpose than similarly-priced dynamic or condenser mics, though, so I don’t usually recommend a ribbon for a budding bedroom producer’s first utility mic. Still, I love the way ribbons sound on my saxophone, and the RCA 77 at Pedernales Studios (now at Arlyn in Austin) was thrilling to use. A company called AEA makes excellent modern ribbon mics modeled after the great RCA ribbons, and they’re worth exploring if you happen to love that sound. Be aware that phantom power, which is necessary for condenser mics, can actually destroy ribbons!
V. Monitor Speakers and Headphones
Monitoring is a crucial aspect of recording and producing music. You’ll need a way to hear your reference track while you record your part, you’ll need playback of something you’ve just recorded to make sure it’s right, you’ll need to hear how microphone placement affects your tone, you’ll need to make sure your signal is high enough to be heard but not so loud that it’s clipping or distorting… As obvious as it might seem, monitoring is an aspect of recording that many musicians neglect.
Your interface will probably have at least three audio outputs: one for headphones, one for your left speaker, one for your right speaker. It’s important to have both headphones and speakers for numerous logistical and functional reasons, and it’s important that they’re designed to be as acoustically flat as possible, without the enhanced low-end that plagues consumer speakers.
When you’re recording with a microphone, you can’t have loudspeakers playing in the room with you, or the mic will pick that sound up along with the sound you’re producing. Headphones take care of that. While you’re recording your voice or an acoustic instrument, turn the volume of your speakers down and your headphones up. Listening with headphones can also help you zoom in on details that might be more hidden or blended when listening to speakers.
Loudspeakers are extremely important for hearing the big picture and to get an idea of how a part or mix will feel to an end listener. Headphones can also be much more fatiguing than listening on speakers, so it’s good to alternate. If you track electric instruments via DI, you don’t need to worry about microphone bleed, so tracking with the loudspeakers on is just fine, but it can be easier to feel bass frequencies in headphones if your speakers aren’t enormous and powerful.
Good studio headphones are relatively affordable. Some industry standards include Sony MDR7506 (I own two pairs of these and love them), Sennheiser HD300, Beyerdynamic DT 770, and Audio-Technica ATH-m50x. Good speakers will cost more, but the relatively affordable Yamaha HS5 and JBL LSR305 studio monitors are high quality and provide an accurate response within their frequency ranges. Keep in mind that you’ll need a pair of speakers, so plan to budget $300-400 total for a pair of the Yamahas or JBLs. I own a pair of the Yamahas and I love listening to music on them in addition to using them for recording and mixing work.
VI. Go Play
It can be challenging and daunting to learn a complex skill like audio production, and it feels weird that accomplished musicians are being forced to adapt to these new conditions. Fortunately, after the first few hurdles and frustrations are passed, the process of recording and producing good-sounding audio becomes extremely satisfying, empowering, and enjoyable. Experimenting with recording yourself soon starts to feel more like play than work.
I feel very lucky that my independent interest in these things has proven to be an unexpected advantage during this awful global crisis, but I’m also excited to share my experiences with friends and colleagues, and to increase the number of wonderful musicians around the world with whom to collaborate. If you’re interested in collaborating with me on a creative project involving music and audio, or if you want to talk about anything in this article, email me. We’re living through a tough time, but those of us who are able should use it as an opportunity to learn something new, improve our craft, and make the world sound a little bit better.

Very helpful blog, man. Thank you. I’m just delving into this world and I’m happy to say I was able to get all the right gear. Getting my sax to sound great, well that’s a different story. Thanks again!
You’re very welcome! And yes, the source will always and forever be the most important part of the recording chain. The better you sound, the… well… better you sound.
Thanks again for sharing,so much helpful information!